

Fall afternoons can leave kids restless while you juggle dinner, work, or a tight budget, so come visit Lauderhill Mall, shop together, and enjoy a warm welcome from our local community!
Low-cost fall crafts and simple at-home activities can keep your kids busy while giving families a cheerful way to spend time together.
We know family schedules and budgets look different from one home to another. A free afternoon may mean fitting a project between work calls, school pickup, or dinner. It can also mean finding something fun without buying a lot of new stuff.
Here, we focus on easy projects made with common supplies and clear steps. You can adapt them to your child’s age, your available space, and the time you have. Some ideas invite careful hand movements; others make room for reading, movement, or helping at home.
You do not need a perfect craft room or a long stretch of free time. A kitchen table, a few supplies, and a grown-up nearby can be enough to get started. Keep the plan simple, and let children add their own touches.
As you choose an activity, think about what your family already has and what your child enjoys. A few simple supplies and a little room to create can turn an ordinary fall day into shared family fun.
How Can Fall Crafts Keep Your Kids Busy at Home?
A bowl of measuring cups and a few big spoons can give kids a simple kitchen activity while you get on with the day. Rotate easy activities and give children one clear, hands-on task at a time.
Fine-motor play is a hands-on activity that practices small, controlled hand and finger movements. At home, children can push, clip, sort, and move safe materials from one place to another. These simple games offer a focused job without much setup.
Try these household setups when you need ideas to keep your kids busy. Each activity can use everyday items, and you can change the materials to suit your child. The same activities to keep your kids busy can also help fill a summer day at home.
- Push ribbons through a clean, empty bottle.
- Clip clothespins around the rim of a bucket.
- Sort blocks by color or size.
- Transfer tissue paper between two containers.
Give one task at a time, then let your child repeat it or change the challenge. A younger child might move a few pieces, while an older child could sort by two features. Stay nearby and choose materials that fit your child and the play space.
Kitchen play can stay simple, too. Tupperware bowls can be stacked, then matched with their lids. Measuring cups can be sorted from small to large, or used to scoop dry items into a larger bowl. Keep food prep separate when a play setup needs close attention.
To keep kids busy at home during summer, bring out one familiar activity and add a small change. Try new colors, containers, or a different sorting rule. A short task can be enough when a child needs a break between other parts of the day.
Choose activities that are easy to pause if dinner, work, or a call needs your attention. Leave the setup in a safe place, and invite your child to return when it suits your routine. Keep the activity easy to reset, so the same materials can come back out another day.
How to Keep a 4-Year-Old Busy at Home
A 4-year-old can decorate a paper airplane, then take turns sending it across a clear space and bringing it back. At home, pair that active game with books, a puzzle, or a cozy place to play.
Fold a simple airplane from recycled paper and let your child add colors or marks. Take turns flying it, then walking to retrieve it. A short flight game gives a preschooler a clear job and a chance to move.
A blanket fort can offer a quieter change of pace. Drape a blanket over a table or couch, then add pillows, books, or a few toys. Let your child decide whether the fort becomes a reading spot, a pretend house, or a calm place to rest.
Books can keep a child engaged without a formal lesson. Invite your child to choose a favorite and look through it together, or listen while you read aloud. A reading goal should fit the child’s ability; a few pages, one story, or a picture talk can all count.
A puzzle gives little hands and minds another focused task. Choose one your child can approach without frustration, and work on a few pieces at a time. You can sit close, name what you notice, and let your child decide when to take a break.
To keep a 4-year-old busy at home, offer a small choice between a quiet activity and movement. Your family’s routine may allow play before dinner, after school, or in short breaks between other tasks. There is no need to fill every minute.
Try a simple movement game if energy rises. Your child can walk like a bear, hop across a clear area, or follow a path made from cushions. Keep the route open and match the movement to the space you have.
Interests can shift quickly at this age. Stay flexible, and let a child move from play to a book without treating the change as a problem. Let your child choose between a quiet book or a little movement when their interest shifts.
How to Keep a 7-Year-Old Busy at Home
A 7-year-old can help with a small, clear household job such as raking leaves or putting toys away. A useful task can add purpose to the day while leaving room for play.
Children ages 5-7 may be ready to rake leaves, sort laundry, put toys away, sweep floors, or water flowers. Choose a job that fits your child’s ability and your family routine. A manageable task can help a child feel included in everyday work.
If your school-age child is new to responsibilities, introduce one new task at a time. Show what finished looks like, and keep the first try brief. Children learn a household routine through practice, not through a long list of jobs.
Use these steps to get started with one task:
- Agree on the task together.
- Show your child how to do it.
- Keep the needed supplies easy to reach.
- Check in after the first try.
A child may need help finding the right broom or remembering where laundry goes. Stay close enough to answer questions, then give space for the child to try. Specific praise, such as noticing careful sweeping, can make the work feel understood.
For a 7-year-old, a job might fit before play, after a meal, or as part of getting ready for the next day. Let your child know when the task is complete. A clear end point keeps the job from feeling endless.
Household responsibilities should not replace play. Children need chances to imagine, move, read, and spend relaxed time with family. A small job can be one useful part of the day, rather than the whole plan.
If a task feels too hard, make it smaller or try again together. A child who is learning to sweep may start with one small area. Start with one new responsibility and give your child time to feel comfortable with it.
How to Keep an 8- to 10-Year-Old Busy at Home
An 8- to 10-year-old can help with dinner or groceries and still enjoy a creative project afterward. Older kids may welcome a practical role that lets them work alongside you.
Children ages 8-10 can help make dinner and put away groceries, along with tasks suited to younger school-age children. Choose a role that fits the day, such as setting out ingredients or sorting pantry items. Keep the job clear and make sure your child knows when it is done.
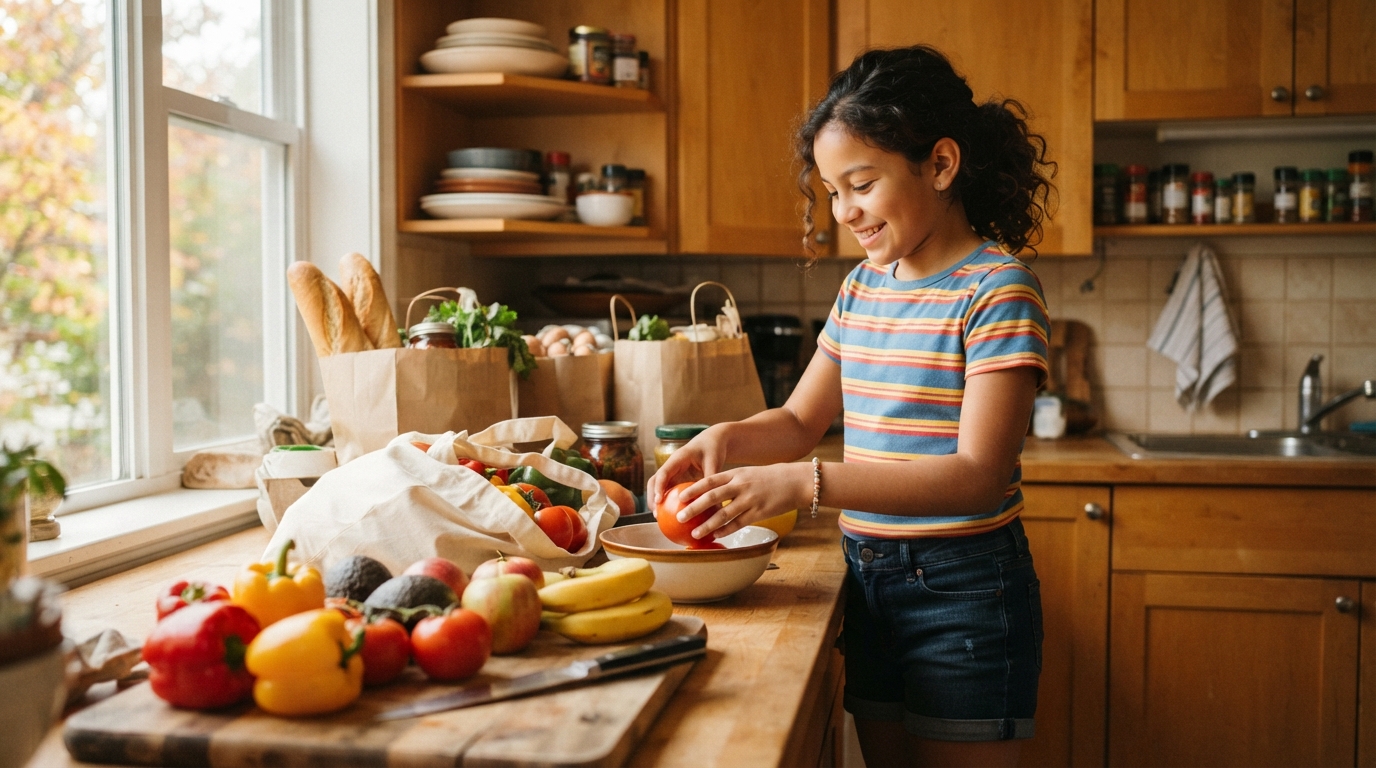
An 8-year-old might wash produce or stir a mixture while you handle the rest of dinner. A 10-year-old may be ready to group groceries by where they belong. Match the role to your child’s skills and your family’s usual routine.
These jobs can feel more like shared family time when children have a real choice. Ask whether your child would rather help with one dinner step or organize a few bags. Work side by side, talk about the meal, and thank your child for a specific contribution.
A child may be more willing to help when the result is easy to see. Putting away a small group of groceries can clear the counter. Setting out napkins or utensils can make the table ready for everyone.
Keep the task in proportion to the day. School work, rest, and play still matter, so a household job should fit around them. If your child seems tired, choose a smaller part or make the task a team effort.
When dinner needs your attention, a simple role can help your child stay involved without taking over the whole kitchen. Tell your child which tools or foods are part of the job. Let your child ask questions as the routine becomes familiar.
Creative activities can follow a practical task, or they can come first when the day allows. Older kids may enjoy choosing what to make after helping, while younger ones may prefer a shared project. Choose a job your child can complete alongside you when they are learning a new routine.
How to Keep a 12-Year-Old Busy at Home
A 12-year-old may enjoy choosing a project and taking charge of one clear part of the family routine. A supervised simple meal can be one option, alongside independent choices like reading or planning a craft.
Children ages 11-12 can cook a simple meal with supervision, as well as take on household tasks suited to ages 8-10. Agree on which part your child will handle and what help you will provide. Shared expectations let an older child take part without being left to guess.
Let your child choose a project that fits the time and supplies available. They might plan a craft, set up a puzzle, read, or organize a small project. A choice gives an older child more ownership than a task selected for them.
For a meal, your child could take charge of one simple step while you supervise nearby. Talk through the plan before starting, including which kitchen tools are needed. Keep your role clear, so your child knows when to ask for help.
Some days, an older child may want company. On other days, they may prefer space to work independently. Ask what kind of help would be useful, then agree on a check-in point rather than hovering throughout the activity.
A small project can be a good choice when there is time to focus. Your child might gather materials, decide on a plan, and put the supplies back afterward. If the task is too large, help break it into parts without making every decision for them.
Family routines can give a 12-year-old a meaningful role. A child who helps prepare a meal or organize a project can see how their effort supports others. Make the task fit the day, rather than turning every free hour into work.
Older kids still benefit from rest, play, and time with friends. Leave room for those parts of the day alongside household jobs and creative plans. Agree on the task and the check-in point before your child gets started.
How Can Kids Make a Fall Tree Print With a Fork?
A fork dipped in washable paint can make a lovely cluster of fall leaves around a simple drawn trunk. This activity uses cardstock, markers, washable paint, and a fork from home.
Draw a tree trunk and branches on cardstock with a marker. Put a small amount of washable paint on a plate or other easy-to-reach surface. Dip the back of a fork into the paint, then press it around the branches to print leaf shapes.
Use washable paint to make this project approachable for a home art session. Children can add more prints as the branches fill in, or leave open space around the trunk. A marker can add details after the painted leaves are in place.
Before the activity, invite kids to make a few choices about their picture:
- Choose a trunk shape.
- Pick a fall color mix.
- Decide where the branches spread.
- Add a small detail to the background.
The choices give each child a way to guide the picture without changing the basic activity. One tree might have wide branches and a bright mix of colors. Another may have a narrow trunk and just a few prints.
Use a sturdy piece of cardstock so the paper can hold the paint. Children can press the fork gently, then lift it to see the shape. If a print looks different than expected, it can become another part of the tree.
This art activity can fit a short stretch of creative time or a longer afternoon. Let children work at their own pace, and give them room to decide when the page feels finished. Keep the materials within reach, but let each child lead their own design.
A fall tree does not need to look like a real one. Branches can curve, leaves can gather in one corner, and the background can become part of the story. Give each child room to make their tree look different from everyone else’s.
How Does the Pumpkin Letter Painting Activity Work?
A clothespin-held pom-pom turns a letter hunt into a hands-on pumpkin painting game. Draw several pumpkins on cardstock, label each with a letter, and invite your child to find the one you name.
Use markers to outline the pumpkins and write a familiar letter inside each shape. Clip a craft pom-pom in a clothespin, then let your child dip it into washable paint. Ask for a letter, and have your child dab paint onto the matching pumpkin.
The activity can suit children who are learning to notice letters or who already enjoy a quick search game. Start with letters your child knows, such as the first letter of a name. You can also take turns calling out a letter and finding its pumpkin.
Keep the number of pumpkins manageable for your child. A few large shapes may work well for a first round, while a child who enjoys the challenge can look across more choices. There is no need to use the whole alphabet at once.
The clothespin gives the child a small tool to hold while making paint marks. Let kids control how much paint they dab onto the page. A pom-pom can make soft dots, and each pumpkin can have its own color or pattern.
To keep the learning playful, avoid turning every turn into a test. Offer a hint if a child needs help, or point to the letters while saying their names. A familiar name or word can make the letter hunt feel personal.
Families can change the rules to fit the child’s interests. Take turns choosing the next letter, or let the child name a pumpkin after someone in the family. The point is to enjoy the activity while noticing letters together.
After your child finds one letter, keep the game moving with another familiar choice. When it is your turn, let your child be the caller and watch you search. Let your child call out a letter for the next person to find.
Can Coffee Filters Become Colorful Fall Leaves?
A few marker colors and a little water can spread into soft patterns on a coffee filter. Once the marked filters dry, trace leaf shapes and cut them out for fall decorations.
Color across a coffee filter with markers, using several shades or keeping the design simple. Add a little water so the colors spread through the paper. Set the filters aside and let them dry before drawing any leaf outlines.
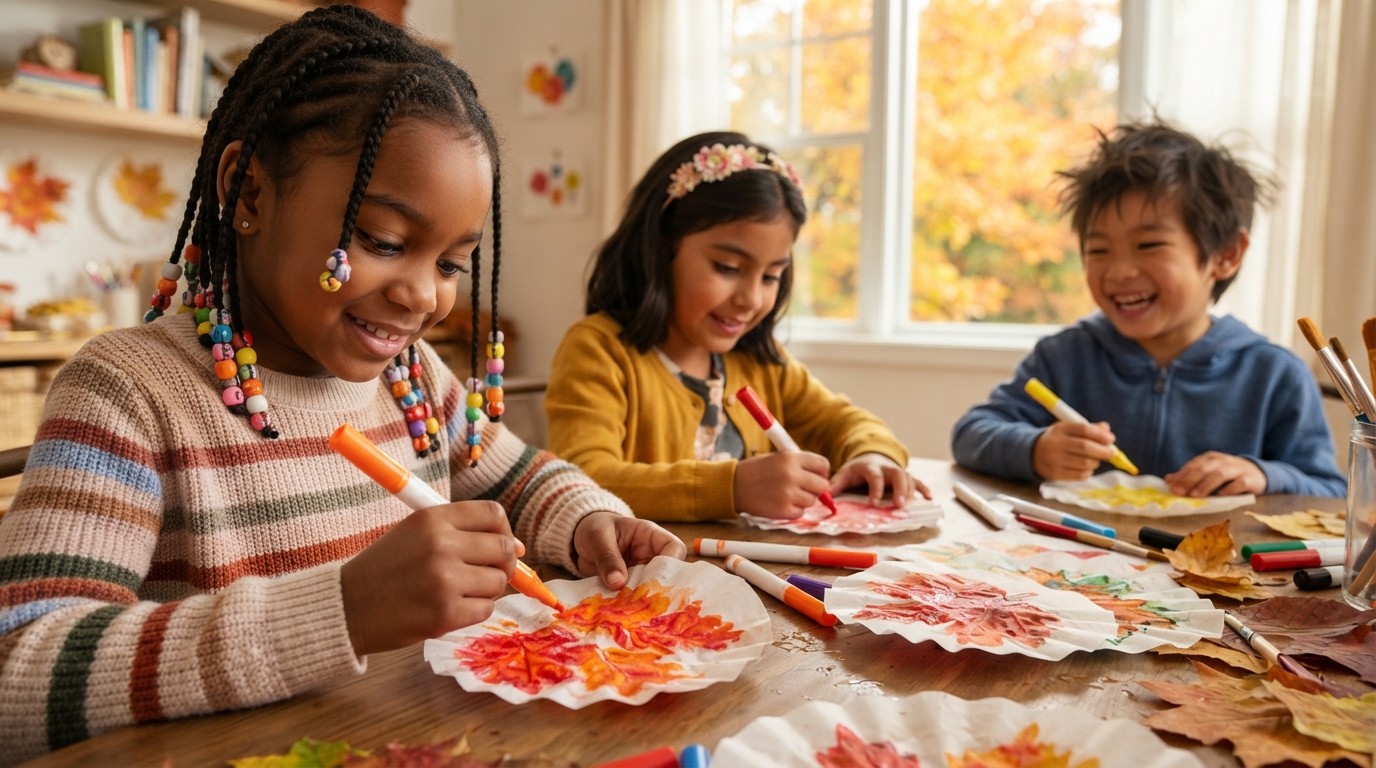
When a filter is dry, trace a leaf shape and cut along the line. Children can make different sizes and shapes, then choose how to arrange them. The paper can hold soft color patterns that look distinct from solid marker lines.
Let kids decide which colors to combine. One filter might have warm shades in one area, while another can mix colors across the whole circle. If a child wants a different look, try a fresh filter and change the pattern.
Finished leaves can decorate a wall, a doorway, or a family craft display. They can also be arranged around a room where the colors are easy to see. Use a way to display them that suits your home and does not block a path.
This project offers a different kind of paper activity from drawing on cardstock. Coffee filters are thin, so children can watch the color move through the material. Give them time to explore the patterns before tracing the shapes.
Set the filters on a surface where they can stay undisturbed while drying. The drying time can vary with the amount of water and the room conditions. Check that the paper feels dry before handing it to a child for cutting.
Some children may want to cut their own shapes, while others may prefer help with the scissors. Choose the approach that fits your child’s skills and the tools you have. Wait until each filter is dry before tracing and cutting the leaf shapes.
What Can Kids Make With Pasta, Beans, and Puffy Paint?
Equal parts shaving cream and glue make a puffy paint mixture for raised details. Kids can use it for a separate paper project, or make a textured sunflower with pasta and black beans.
For the sunflower, draw or build a flower shape on cardboard or paper. Paint the flower, then glue pasta around its center to form the petals. Fill the center with black beans, and let children arrange the pieces as they like.
The sunflower uses a mix of materials that gives the finished picture a raised texture. Cardboard offers a firm base, while paper can work for a lighter project. Choose whichever surface fits the supplies and space you have.
Puffy paint is a separate option for adding raised marks to other fall crafts. Mix equal parts shaving cream and glue, then use the mixture for simple details. Try these ideas on paper:
- Raised veins on a leaf.
- Ridges on a pumpkin.
- Simple dots along a paper border.
- A child’s initials on a craft card.
Let children choose the details they want to add. A few raised lines can give a leaf a clear shape, while initials can make a card feel personal. Keep the puffy-paint idea separate from the sunflower if you want one activity at a time.
Set out only the materials needed for the project you choose. A child can focus on arranging pasta and beans for the flower, or adding details with the paint mixture. Keeping the choices simple can make it easier to start.
Give the sunflower a safe place to sit after the pieces are glued down. Children can help choose where it belongs once it is ready to display. Let the sunflower dry in a safe spot before displaying it.
Which Fall Crafts Turn Leaves and Pumpkins Into Keepsakes?
Painted pumpkins, leaf-filled window-catchers, placemats, and pine-cone bird feeders can turn seasonal materials into keepsakes or outdoor fun. Choose a project based on whether your family wants a decoration, a useful display, or an activity outside.
For pumpkin painting, let children choose their own pumpkins and add stripes or faces. Each design can show a child’s style without needing a fixed pattern. A painted pumpkin may sit on a shelf or near a family gathering space.
A leaf window-catcher or placemat uses leaves and paper cutouts between two pieces of adhesive laminate. These projects can hold pieces gathered or made by children. A window-catcher can bring color to a window, while a placemat makes a place setting more personal.
Families who want an outdoor project can make a pine-cone bird feeder. It offers a different way to use a fall object and gives children something to place outside. Choose it when the family would rather make something for outdoor use than a room decoration.
Leaves are not the only things that can make prints. Apples, zucchini, and other squash or fruit can make leaf-like prints, too. Children can explore different shapes and see how the results change with each piece.
These choices suit different interests and kinds of family time. A child who likes to decorate may prefer a painted pumpkin. Someone who enjoys arranging shapes might choose a window-catcher or placemat, while a nature-loving child may like the bird feeder.
Let the project match the day and the materials you have. Children can help decide whether they want a display for home, something to use at the table, or an outdoor craft. Leaf window-catchers and placemats can hold both leaves and paper cutouts.
Give children a say in the look of their finished work. Their color choices and shapes can make one project feel unlike another. Invite each child to choose the project and the colors or shapes that feel like theirs.
What Should We Check Before Choosing Paint for Pumpkin Crafts?
Check the age label, the amount of paint, and how much color you want to remain on a cotton cloth after washing. The Crayola Washable Paint Classic set has six 59ml bottles and is labeled for ages 3 and up.
In a cotton-cloth wash test, two of its six colors remained really visible after one wash. The paint washed off hands very easily. This separates skin cleanup from how much color stayed on cloth.
The TBC The Best Crafts Squeezable Paint set has 12 colors in 24ml containers and is labeled for ages 3 and up. About half of its 12 colors remained very visible after washing, while the paint washed off skin very easily.
The BLOT Finger Paint set has 10 colors in 36ml containers and is also labeled for ages 3 and up. Its colors remained more visible after washing than the worst-performing colors in the other two sets. The paint washed off skin very easily.
These cotton-cloth results describe visible color after washing, not how easily paint comes off skin. A product’s color count and container size may matter when you plan how much paint to set out. A wash test cannot say which set fits every family.
Use the age guidance, color range, and amount in each container to make a choice that suits your activity. The three sets have different color counts and sizes, so check those details against your plan. The cotton-cloth wash-test results also show that skin cleanup and cloth stains are separate concerns.
Before opening paint, cover the work surface with a plastic sheet or drop cloth. Set out only the amount needed for the activity, and keep the rest closed. A covered table can help protect the surface from paint spills.
Paint can still reach the edge of a work area, so leave room for children to place their hands and tools. Put a plastic sheet or drop cloth under the pumpkin project before opening the paint.
What Safety Checks Matter for Fall Crafts?
Start by matching the activity materials to the child’s age and the space where you will be working. For craft supplies and toys, federal small-parts rules set limits for products intended for young children.
US federal rules ban small parts in products intended for children under 3 years old. A product for children ages 3-6 that contains a small part when received by the consumer must carry a warning on its online advertisement and packaging.
The Consumer Product Safety Commission defines a small part as an item that fits fully inside a test cylinder 1.25 inches in diameter and 1-2.25 inches deep. That definition does not replace the product’s age label or warnings, and a warning does not make a small part safe for every child.
Before play begins, make the work area simple and easy to watch. These four setup checks can help:
- Clear the work area.
- Set out only the supplies needed.
- Keep water play in a shallow container with a towel nearby.
- Put tools and leftover pieces away after the activity.
Stay close enough to notice how a child uses the materials. A setup that works for one child may not suit another child in the same room. Match the activity to the child’s skills and the space available.
Families who want simple, hands-on play can try masking-tape toy rescue or shadow tracing. These activities offer a change from craft supplies and can use things already around the house. Choose the option that fits the child and the moment.
Masking-tape toy rescue can invite a child to free toys from strips of tape. Shadow tracing gives children a chance to follow shapes with a pencil or marker. Keep the play space clear enough for your child to reach the materials without climbing or leaning over furniture.
Rules help set expectations for children’s products, but labels still matter for each item. Check the age guidance and warnings on a product’s packaging and online listing before buying it.
How Can a Family Visit Lauderhill Mall Fit a Fall Day?
A fall day can include time together at home and a family shopping visit to Lauderhill Mall. The trip can give everyone a chance to shop together and enjoy time in a welcoming local community.
Some families may plan a craft at home before heading out, while others may save creative time for later. Make the day fit your schedule, whether you have a broad stretch of free time or only a small window between other plans.
Lauderhill Mall is a destination for family shopping and a way to connect with the mall’s local community. Visiting together can turn a usual shopping task into shared time. You can move at a pace that feels comfortable for your family.
Invite children to be part of simple choices during the visit. They might help keep track of the items your family needs or talk with you about what to look for. A shared list can give children a small role without making the trip feel like a chore.
Families bring different needs to an outing. Some may want to keep the visit brief, while others may have more time together. Plan around the people in your group, including anyone who needs breaks or a slower pace.
Shopping together can also be a chance to support the businesses that serve the community. Keep the visit welcoming by being considerate of other shoppers and the people working nearby. Children can learn from seeing families and neighbors share a public space.
There is no need to make a family outing complicated. Choose the kind of visit that works for your schedule, and leave room to adjust if the day changes. A local trip can be one part of a fall day, not a full-day commitment.
Bring the people you want to spend time with and make choices that suit your family. Make the visit your own by choosing a time that works for your family.